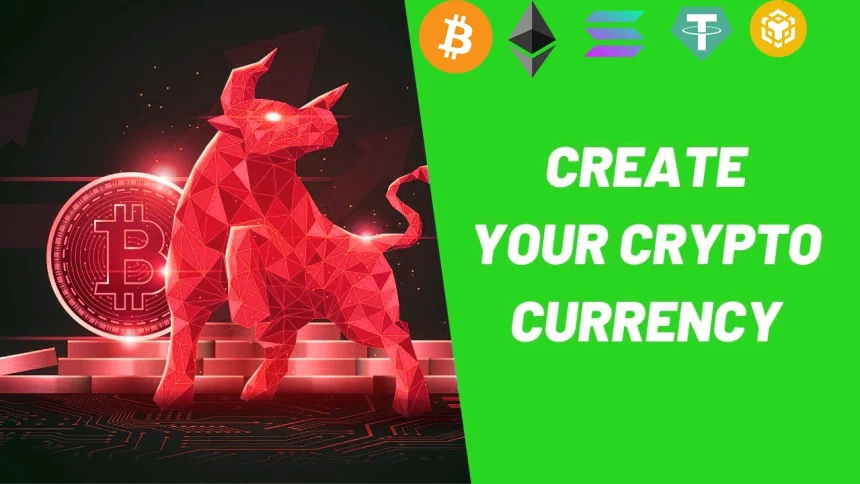
Creating a cryptocurrency used to be one of those things that sounded so complicated, so far out of reach for someone without a computer science degree, that it might as well have been rocket science. I remember sitting in my apartment a few years back, staring at a screen full of code on GitHub, trying to fork an existing blockchain project. Let me tell you, it was a mess. I got about ten minutes in, realized I didn’t know Solidity from silly putty, and gave up. I figured the dream of having my own coin was dead.
Fast forward to last week. I was bored on a Sunday, remembering that failed attempt, and decided to Google where things stood. And wow, was I surprised. I stumbled upon platforms that let you do it all without touching a single line of code. It felt like cheating. Specifically, I found a tool called Smithii, and it genuinely took me about five minutes to go from nothing to a living, breathing token on the Solana blockchain. It’s a no-code dApp that basically holds your hand through the whole process . So, if you’ve ever had that itch to create your own digital currency—maybe for a community project, a joke with friends, or even a serious business idea—stick with me. We’re going to walk through exactly how to do it, the pitfalls to avoid, and what to do after you hit that final button.
Here’s the pc… I mean, here’s the thing, though. Just because you can create a crypto doesn’t mean you should just willy-nilly throw something together. The most important decision you make actually isn’t about the name or the logo. It’s about picking the right foundation.
The Crossroads: Picking Your Blockchain Playground
Think of choosing a blockchain like picking a neighborhood to open your new business. Each one has a different vibe, different foot traffic, and different rent costs. If you build on the wrong one, your token might just sit there collecting dust. You have two theoretical paths: building your own blockchain from scratch (which is like building an entire city just to open a lemonade stand—massive overkill) or piggybacking on an existing one. We are 100% going with the second option .
So, which neighborhood do you move into? Smithii works with about 11 different chains, but let’s look at the heavy hitters .
First up, you have Solana. This is the bustling, high-tech downtown. Transactions are confirmed in seconds, and the fees are dirt cheap—we’re talking pennies . If you’re making a meme coin or something that needs to be traded fast and furiously, this is your spot. The ecosystem is super active, with a mix of DeFi, NFTs, and yes, a ton of memecoins . You can even add a transaction tax using the SPL-2022 standard if you want to fund a project wallet automatically .
Then there’s the granddaddy, Ethereum. This is the historic, established part of town. It’s where everyone knows the rules. The tooling is rock-solid, and every dApp under the sun is compatible . But, just like a trendy neighborhood, the rent (gas fees) can be absolutely astronomical during peak hours. If you’re doing something more high-brow, like a serious NFT project or a DAO, the security and reputation of Ethereum might be worth the cost .
Don’t sleep on BSC (BNB Chain) . Think of this as the bustling suburb with great highways. It’s fast, fees are generally low, and the users there are what they call “retail”—they love moving tokens around and getting in on new projects . It’s practically built for tokenized projects and games .
Lastly, there’s the new kid on the block, Base. This is an Ethereum “Layer 2,” which is like a fast-pass lane built on top of the old neighborhood. You get the security and connection to the Ethereum ecosystem, but with fees that won’t make your eyes water . It’s perfect if you want the best of both worlds .
My advice? If you already have a community on a specific chain, just go there. Your friends aren’t going to switch wallets just to buy your coin.
Getting Your Ducks in a Row
Alright, you’ve picked your blockchain. Before we dive into the tool, you need two things: a concept and some cash.
First, the concept. You need to decide on a few boring but crucial details :
- Name and Symbol: This is your brand. “DogWifHat” ($WIF) works. “MySuperAwesomeProjectToken” ($MSAPT) maybe doesn’t. Keep it snappy.
- Supply: How many tokens will ever exist? Meme coins often go for a huge supply, like 1 billion, to make the price per token look cheap . A more “serious” project might have 100 million . This is your economics 101 moment.
- Decimals: This is just how divisible your coin is. Most use 6 or 9, so you can send tiny fractions .
- Metadata and Image: You need a logo and a description. Don’t just grab a random picture of a shiba inu. Put some thought into it. I spent an hour making a pixel-art pineapple for a test coin I called “Pineapple Protocol.” It looked ridiculous, but it was my ridiculous creation.
Second, the cash. You need to fund your wallet with the native token of the blockchain you chose. For Solana, you need $SOL. For Ethereum or Base, you need $ETH. You’ll use this to pay the network “gas” fees and the platform fee for the tool itself . On Smithii, for example, creating a token on Solana will run you about 0.3 $SOL plus a tiny network fee . On Base, it’s around 0.01 ETH . It’s not free, but compared to hiring a developer, it’s pocket change.
The 5-Minute Miracle: Creating Your Token
Okay, this is the fun part. I’m going to walk you through the steps using Smithii, because it’s the one I used and it felt ridiculously easy. The process is almost identical on other chains .
Step 1: Connect Your Wallet
Head over to the Smithii dApp. In the top right corner, you’ll see a dropdown to select your blockchain—make sure it’s the one you funded . Then click “Connect Wallet.” If you’re on Solana, you’ll probably use Phantom or Solflare. A pop-up appears, you click a few buttons, and boom, you’re connected. It feels just as safe and familiar as logging into a website with Google, which is exactly the point .
Step 2: Find the Token Creator
Step 3: Fill in the Blanks (The Creative Bit)
This is where your token is born. You’ll type in the name, the symbol, the decimals, and the total supply . There are also spots for the description and to upload your image. Don’t overthink it. Just get your ideas down. For my pineapple coin, I set the supply to 1 billion, simply because it sounded fun. I typed in “Pineapple Protocol” and the symbol “PINE.”
Step 4: The Fancy Stuff (Optional)
Depending on the chain, you might see options for advanced features. On Solana, you might see “Revoke Authorities” . On EVM chains like Base, you can toggle things like “Anti-bot,” “Anti-whale,” and “Airdrop Mode” . These are safeguards. Anti-bot, for instance, stops those annoying automated traders from scooping up all your token the second it hits a market, giving real people a chance . For my first time, I left them alone, but for a real launch, you’ll want to research these.
Step 5: Hit the Big Red Button
Once everything looks good, you click “Create Token” . Your wallet will light up asking you to approve the transaction and pay the fees. You confirm it, hold your breath for a few seconds… and that’s it. The token contract is deployed. You now officially own a cryptocurrency. It appears in your wallet, a shiny new asset in a sea of digital nothingness . I have to admit, even for a joke token, seeing “PINE” in my wallet with a balance of 1,000,000,000 gave me a little thrill.
…Now What? The Afterparty
So you’ve got a token. Congratulations! But right now, it’s worthless. It’s like you’ve printed your own money, but you’re the only one who knows it exists. It has no value because nobody can do anything with it.
This is the moment where most people fail. They create the token, get excited, and then… nothing happens. To give your token value, you need to create a liquidity pool . This is a smart contract that pairs your token with a well-known one, like $SOL or $ETH. You put some of your tokens and some $SOL into this pool. This allows other people to come and trade on a Decentralized Exchange (DEX) like Uniswap or Raydium. It sets the initial price. Without this pool, your token is just a number in your wallet that can’t be bought or sold . Smithii even has tools to help you create this pool, so you can do it all in one place .
From there, it’s all about community. You need to tell people about it, give them a reason to hold it, and build something around it. Maybe it’s a ticket to a private Discord server, maybe it’s a governance token for a club, or maybe, just maybe, it becomes the next viral sensation. Or, you know, you might do what a hilarious statistic claims 43% of token creators do: abandon the project before lunch . Don’t be that person.
FAQ: Burning Questions Answered
Can I create a token on multiple blockchains?
Yep. With a tool like Smithii, you can absolutely repeat this process on different chains. You just select a new network, connect your wallet (with that chain’s funds), and go through the same steps .
How much does this actually cost?
It varies by chain.
- Solana: ~0.3 $SOL + gas .
- Ethereum / L2s (like Base): ~0.01 $ETH + gas .
- BNB Chain: ~0.19 BNB + gas .
So, it’s not free, but it’s a hell of a lot cheaper than a night out.
Can I do this for free?
Technically, yes, but it’s hard. You can write the smart contract code yourself and deploy it on a testnet, or even a mainnet, where the only cost is gas. But that involves learning to code, testing for bugs, and understanding security risks. The small fee for a no-code tool saves you a massive headache .
How many tokens should I make?
That’s the million-dollar question (pun intended). If it’s a memecoin, a huge supply like 1-10 billion is common because it makes the price per token look like a tiny fraction of a cent, which feels accessible . For a serious project with real utility, you might be more conservative, like 100 million. It really depends on your goals and your tokenomics .
My Two Cents
Look, creating a cryptocurrency isn’t just for tech wizards in hoodies anymore. It’s for anyone with an idea and a few bucks for gas fees. The tools have gotten that good. The process I just walked you through took me back to that moment years ago when I was staring cluelessly at code. If I could go back in time and tell my past self, “Dude, in five years you’ll do this with a web form while waiting for your coffee,” he’d never believe it.
So, go ahead. Play around with it. Create your token. But remember, the technology is the easy part now. The hard part—the fun part—is building something that people actually want to be a part of. Now if you’ll excuse me, I have a Pineapple Protocol community to build. Wish me luck.